
I came to the end of my first level of the Altenew's educator certification's program and this is my final challenge of this level. First level was really fun and I learn a lot of the new staff. Most of all it brings me something new in life and some different point of view on cards and how to make them, because I think that before I was a little in routine.

So let see the projects I made. There are feminine and masculine set of 5 cards in nice box, and they can be given also like a gift.

I wanted to create boxes which you later, when the cards are send, use for something else. You can collect some nice things in them, some photos, some letters, jewellery... the possibilities are unlimited.

Let's look every card a little bit more close and let me explain what I made.


On this one I made green wreath and on it I put daisies. All the daisies are stamped with Spring daisy stamp set. In the background I blend it with Baby pink ink. I did also stamp daisies with this color, but they came out totally different color, probably because I used different paper. On pink shade I sprinkle some pink drops. Sentiment is heat embossed with silver powder on a piece of velum and I put it under flowers.


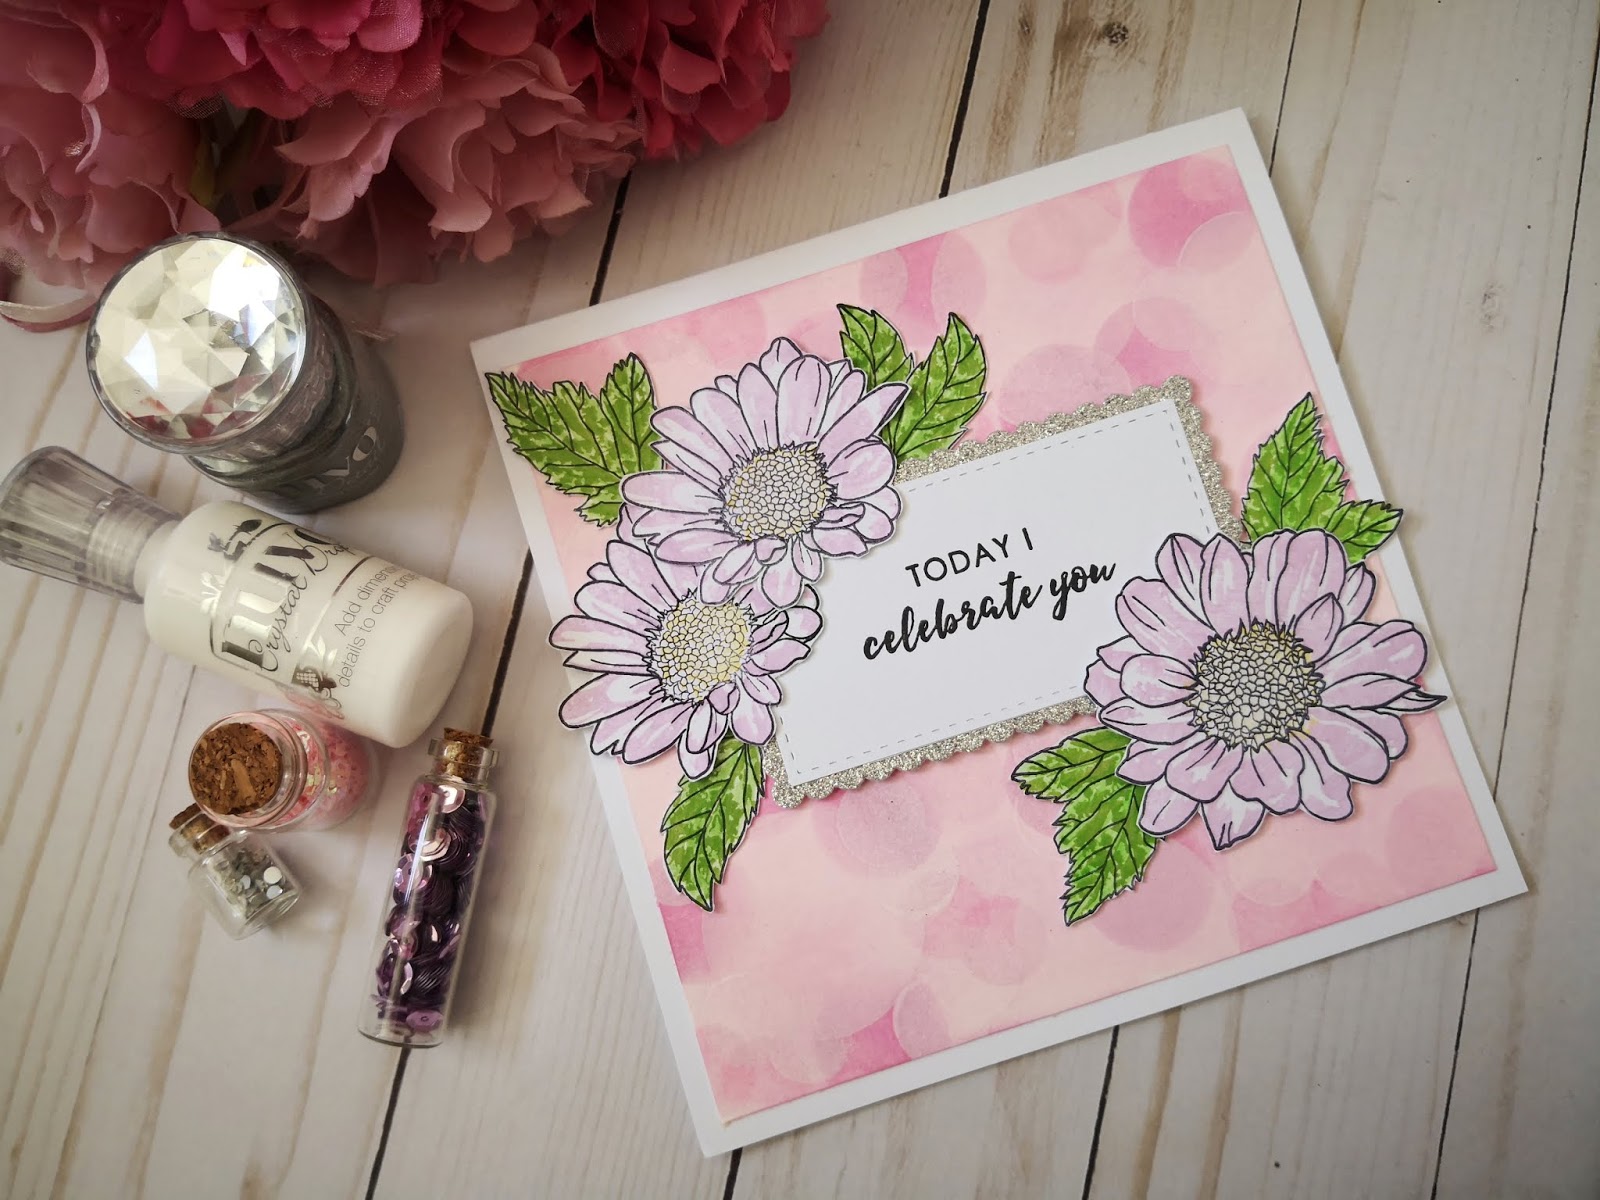
This is the firs time I tried bokeh technique. This is technique which is used in photography, here is made from different shades and different size of circles. And in the end you add some white ones. Then I use daisies again and sentiment stamped on white rectangle with silver glitter paper. I use a lot of green leaves too, to bring a little bit of spring freshness into the card.This stamp set does not totally color the image, which I found totally ok for daisy, because in reality they are white and pink too, but leafs I wanted totally green. So I did use regular color pencil and colored them.


I really really love this vivid magenta color on that card. First I stamp daisies on the paper, spread white embossing powder around and remove it, that stays only outline and then heat emboss it. I wet whole paper and then started to color it in ombre. On the bottom started with Baby pink, continue with Fuchsia and end with Magenta color. Sprinkle some water drops around and let it dry. Then I also heat emboss "for you" sentiment. I glue that paper on card base a little off on purpose, and then I add three thin stripes of glitter paper on the left side.


For this card I had first made stencil. I cut out the mandala from thicker paper and then blend through it. I get pretty white mandala with filled space in pink color. I stamp on velum "congratulations" sentiment and glue it through the center. Here I also use thin stripes of glitter paper. Then I add some daisies and leaves, which also add under the velum for a little bit more interesting look.
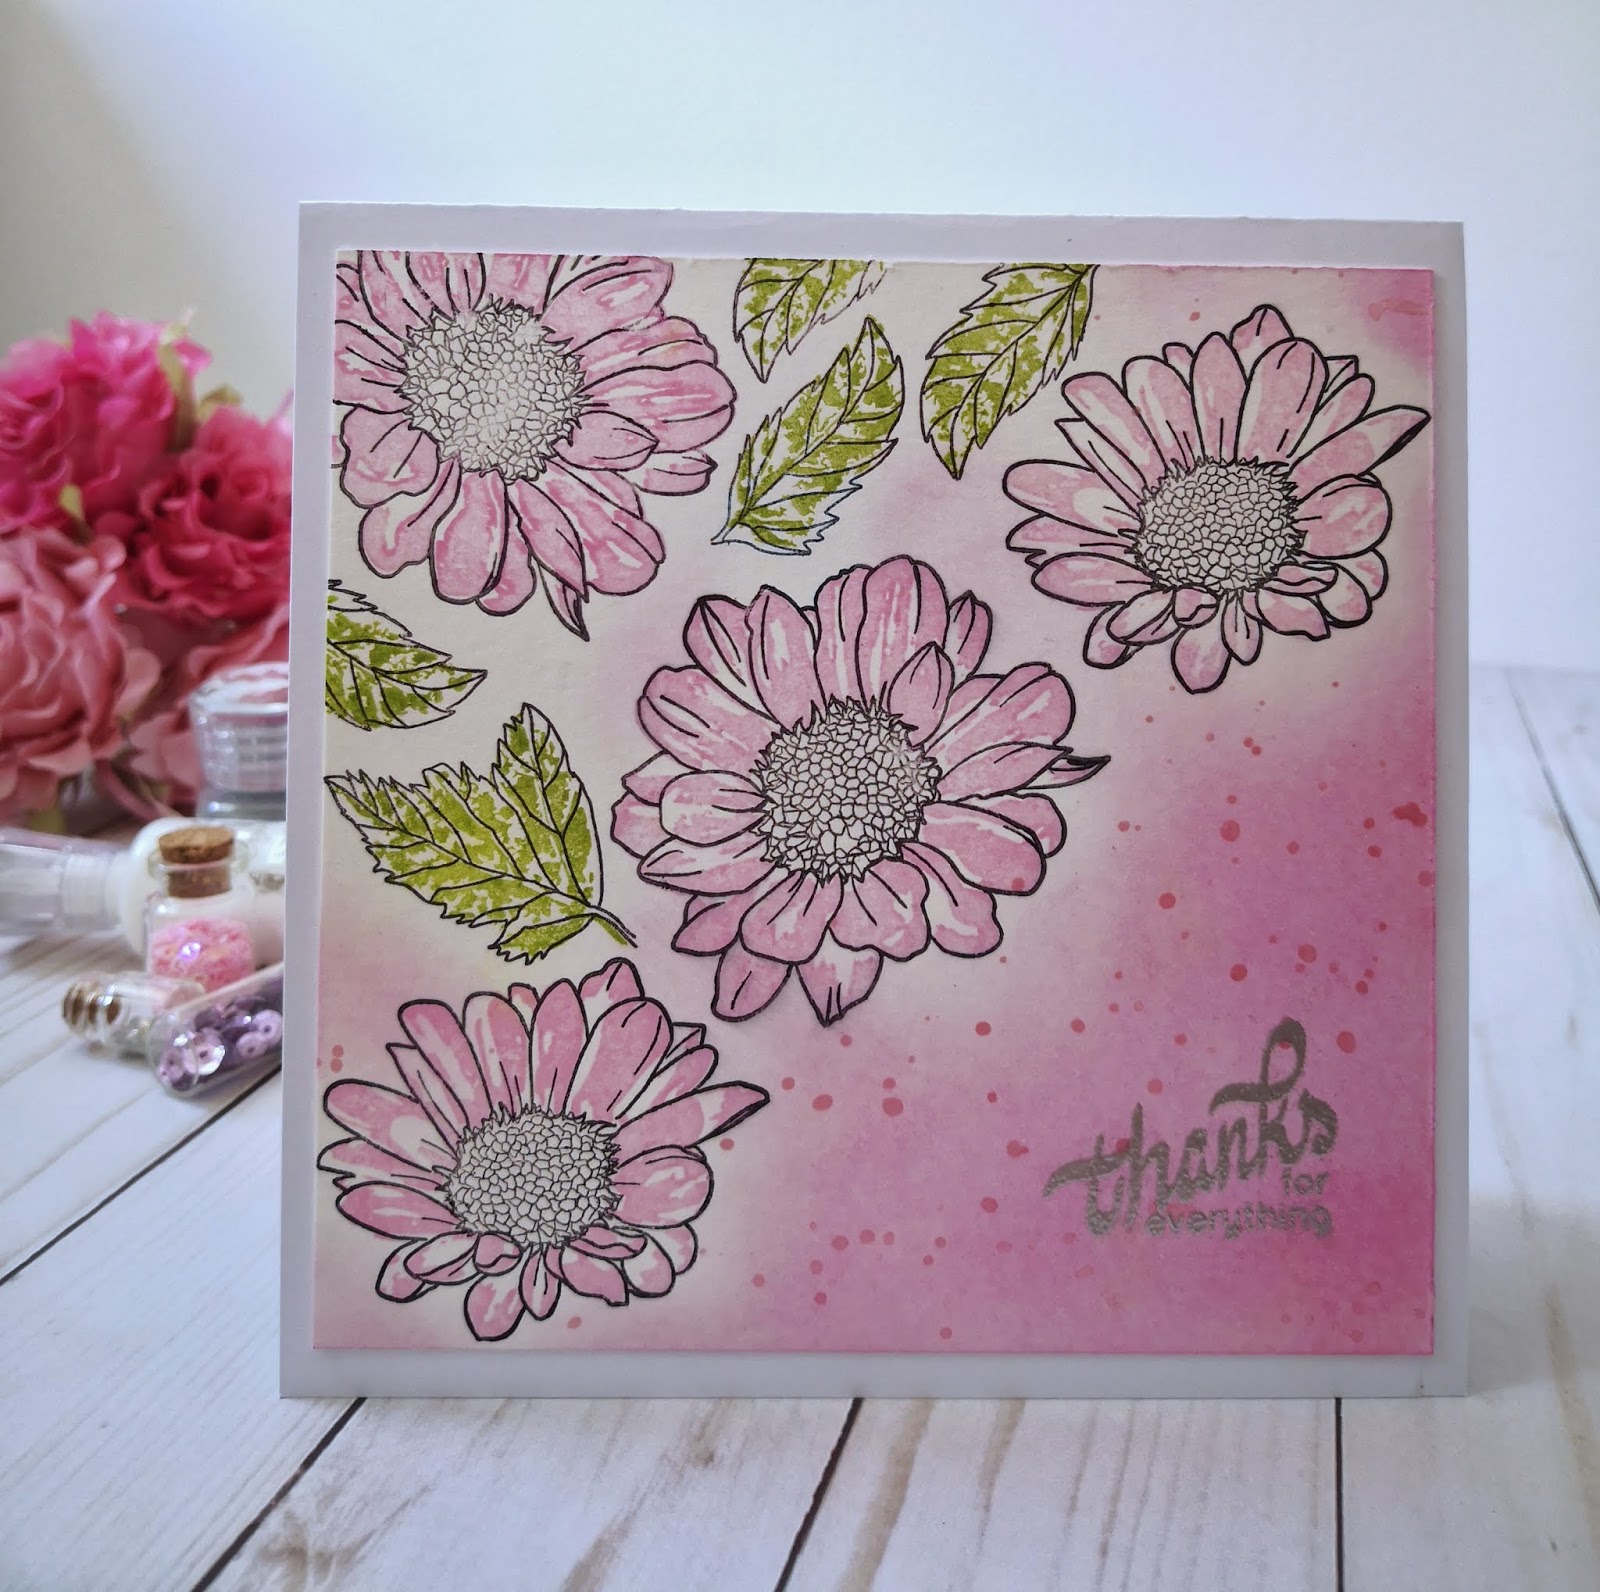

 This is the last card in this set. Here I stamped daisies and leafs on the water color paper, first black outline and then filling. I did blend some pink color around and add some drops. I made this drops with pretty wet brush on which I put some Nuvo mica mist. If I spry it directly to the paper. If I would spray it directly to the paper, here would be way to much drops, with brash you can regulate a little bit where do you want them and how big you want them, depends how you shake the brush. And then I heat emboss sentiment "thanks for everything" in silver.
I also made masculine card set. Set contains 5 cards. In all is red thread blue color and photo camera. On all of them I also use some newspaper, which goes very well with masculine cards.

This set I put in a box I made also. This box can be use later for storing something else. Lets look at the cards.


 Also on all of them I use techniques from before mentioned courses: All about layering 2, Ink blending techniques and let it shine.
On that one I made bokeh effect with two different blue colors and white. Photo camera goes very nice with this effect, because this effect you can made with camera. This is very nice effect, just be sure that you have good white ink pad, otherwise white will just disappear when it will dry. Oh, and it is take s lot of time to dry. In background I put a bit of newspaper, which I mostly wanted to camouflage, because now there are only news about virus. For some shine I add glitter paper stripes which I cross, and put camera on a foam for a little more dimension.


As soon I saw this sentiment "we just click" I knew this will go perfect with some hearts. In background I put newspaper and shadow it with blue shades in ombre techniques, from lighter to darker blue. I use thicker velum and emboss silver hearts on it and glue over the newspaper. on the middle I add camera on foam and sentiment on black banner. I also emboss sentiment with silver powder. I love this card! It can be for Valentine's day, maybe proposal or just at ordinary day to tell someone we love.


 For that card I use newspaper through the whole background and stamp arrows in different directions on it. On that put white paper with cameras in grey color. I use also some velum... And then it came the moment when I watch at the card already here on blog and realize I didn't use any of the ink blending technique. So how to repair the card? I was thinking for a bit and came to an idea to color the velum in blue. That way will be also sentiment seen better and it won't be to dark to not see the cameras behind. I think I correct it pretty well :) I could use darker blue, but I think that this one brings some freshness on the card.
That is the last card in this set. I use newspaper ombre background again. I stamp stars on it and embossed them with silver powder. I put camera on foam and on thicker velum and put in on the center of the card. Below the camera I put black banner with "congratulations" sentiment which is also embossed. When I was making stars I wasn't careful how much space it will be between them, I wanted them to be random. When you emboss is good to use some tool with powder that embossing powder really stick only where you want not all around. There are some special tools or you can make it yourself. I use old socks without pair, clean of course :) and I put baby powder inside and it is working. And if there is anyway some powder left and you don't want it to be there, you can remove it with some thin brush. And when you emboss with heath you need special heating tool, which blows very hot air. Hair dryer is not enough hot for that. Be careful not to burn yourself. When you emboss be sure that its hot enough, otherwise the paper usually wave a little.

So let move to the second part of my challenge. This was really a challenge for me. This is my first time to make video tutorial. I admit I was very nervous, all the time there was some distractions, next time I have to put "Do not disturb" on door, because right that time all the people and dog in house needed me :) Honestly I also had a little difficulties with language, English is not my native language and in my head I think in Slovenian but I have to talk in English. But ok, for fist time, I think it is ok, and I will practice. So lets move to this project.
I decided to make card which I called Friendship card. Now a lot of people is in isolation or going through the hard time, are sick or alone. Cards are small but very nice gesture to show them that someone is thinking to them. And let's be honest always feels good to get something else in mailbox instead of only bills and advertisements.

That is the card I made. I use Baby balloon stamp set. I found this sentiment which is so beautiful. Sometimes we forget how many small things are around us and we can be grateful for. And for sure they stay always in our heart. Because like Maya Angelou said: "People will never forget how you made them feel". I think that this gestures are small but can make difference. You know, be the change you want to see. Below is my video tutorial how to make this card :)
This is the end of my challenge. Hope you like everything I made. I am already looking forward to my second level, for new knowledge, techniques and making more cards.
Thank you for stopping by and take time to read this very long post. See you soon.


The card sets look so good! I am a bit partial to the masculine ones, I love them. You are reeally good at making masculine cards!
ReplyDeleteThank you for entering your work to the AECP assignment gallery.
Dear Erum, thank you! Hehe, I love masculine ones too. Thank god that my hubby give me good advice about newspaper ;)
Delete